The job sheet
The job sheet is the list of tasks your team works through on site — with photo evidence captured on the task it belongs to.
One row per task#
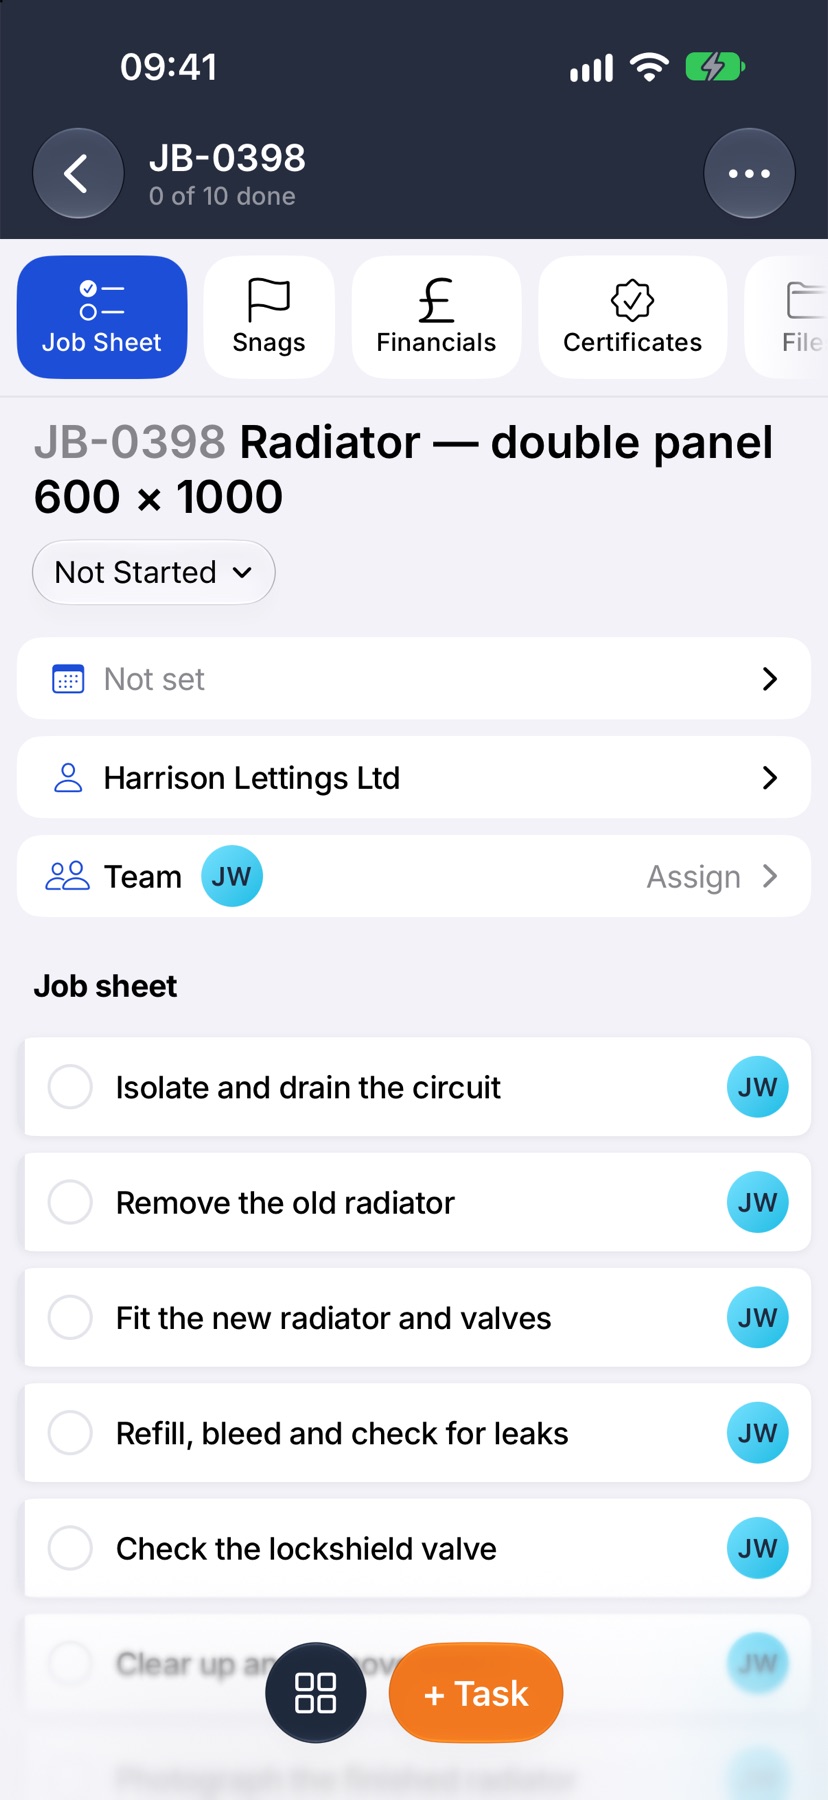
Open a job and you are on the Job Sheet tab. Each row is one task your team ticks off on site. The heading shows who is on the job and how many tasks are done.
- Job team
- Who is assigned to the job. Click it to add or remove people.
- Sub-job
- Adds a separately numbered part of the job, such as JB-0241-1, with its own sheet.
- Add task
- Adds a task to the sheet.
- Continue / Complete
- Continue opens the next task still to do. When every task is ticked it reads Complete, and marks the job complete.
- The round tick
- Click it to mark the task done. Click again to undo.
- Photos
- How many photos are on the task. Click to add more.
- Assigned
- Who the task is given to, if it is not the whole job team.
- Load template
- Adds a saved job sheet to this one.
- Save as template
- Keeps this sheet to reuse on future jobs.
Add a task#
Click Add task. Type what needs doing, then use the chips to file it in a group, give it to someone, set a date, or mark it as a task that needs Photos or a Signature. Click Add task to add it and start another, or Done when you have finished.
Instructions#
Click a task to open it. Whatever you write under Instructionsis exactly what the person on site reads on their phone before marking the task complete. Keep it short and specific. The same window holds the task's Sub-tasks, Photos, Snags and notes.
Photo evidence#
A Photos task holds as many photos as the work needs, each stored against the job and the task. No photo is ever required — the task can be ticked done with or without them, so your team decides what to capture.
GPS and time stamps#
Every photo is stamped with where and when it was taken, so each shot shows the place and the time the work was done.
Where the evidence ends up#
Completed tasks and their photos build the job's evidence record — timestamped, GPS-stamped proof of the work at every stage. It powers the client report, and at billing time it can be attached separately to the invoice when the customer wants to see what was done.
Tip — built a job sheet you'd reuse? “Save as template” keeps it for every future job.
Put the work on a job's job sheet, several tasks at a time.
What a task is
A task is one piece of work on a job, such as “Fit new ladder rail”. The job sheet is the list of tasks, in the order they are done.
Tasks are how the job is worked and tracked. Each one can have its own person, date, instructions, sub-tasks and photos, and the job counts them off as they are ticked: 0 of 7 done, then 1 of 7.
Tasks sit on the job itself, or on a sub-job when the job is split into parts. A task can be broken down further into sub-tasks, which are ticked off one at a time inside it.
The task is where the evidence is kept. Photos taken for it, the signature it asks for and the comments people leave all stay with that task, so anyone opening it later sees what was done.
A job made from a template already has that template's tasks. Add your own on top, or build the whole sheet yourself on a blank job.
Where to start
Open the job. It opens on Job Sheet. Tap + Task at the bottom of the screen.
Type the tasks
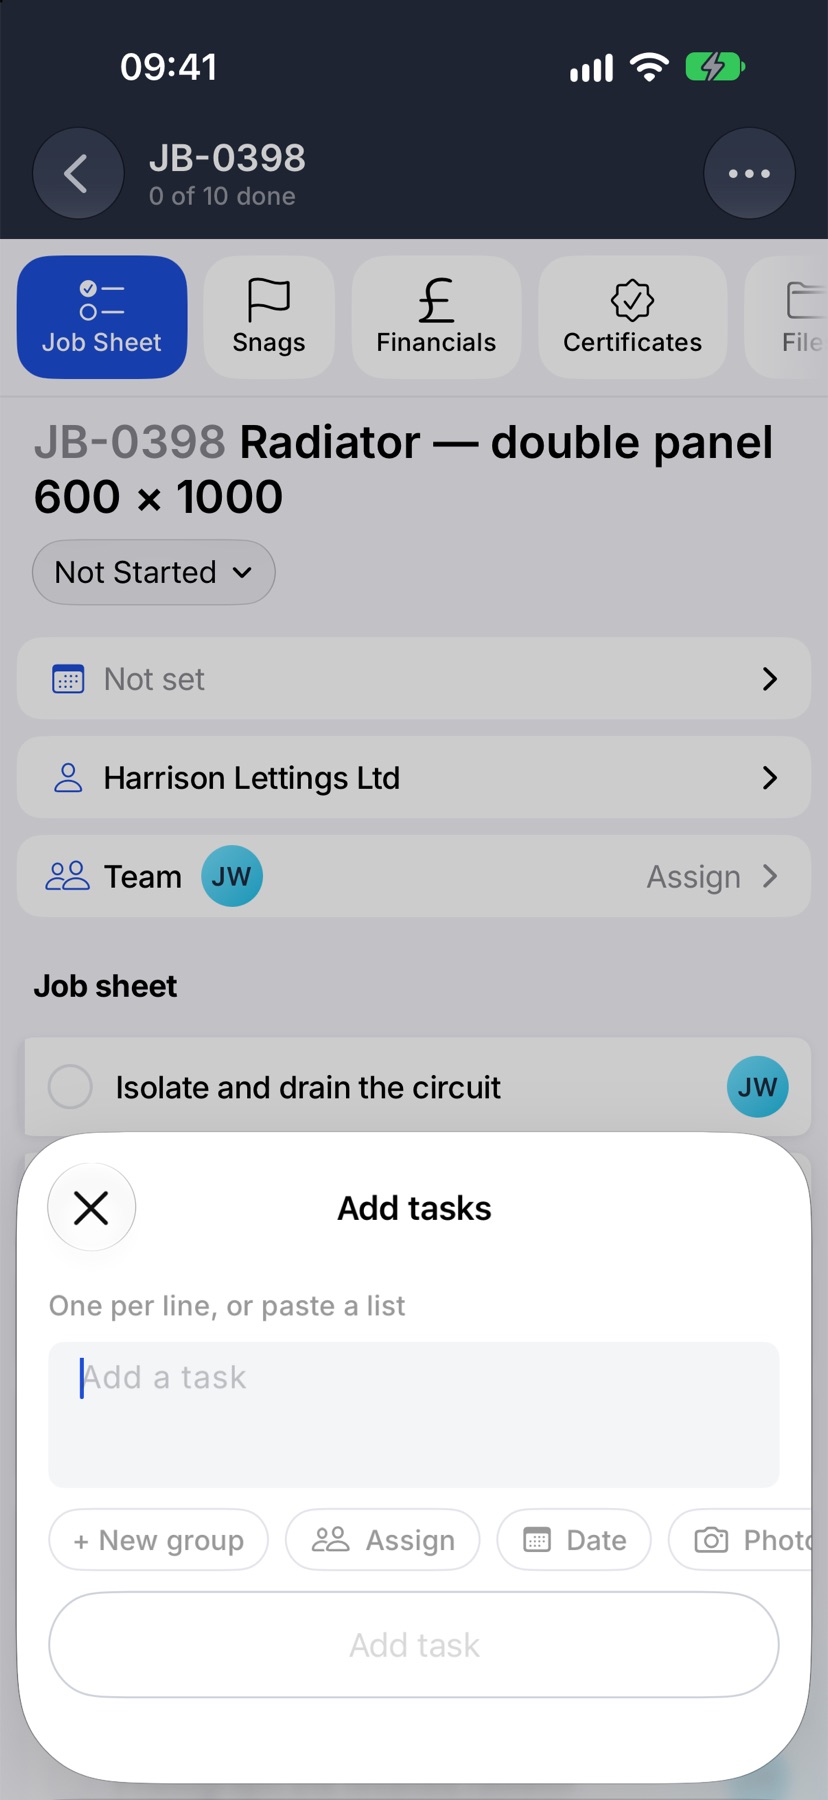
Add tasks opens. Type the first task, then start a new line for the next. You can also paste a list from a text or an email, one task per line.
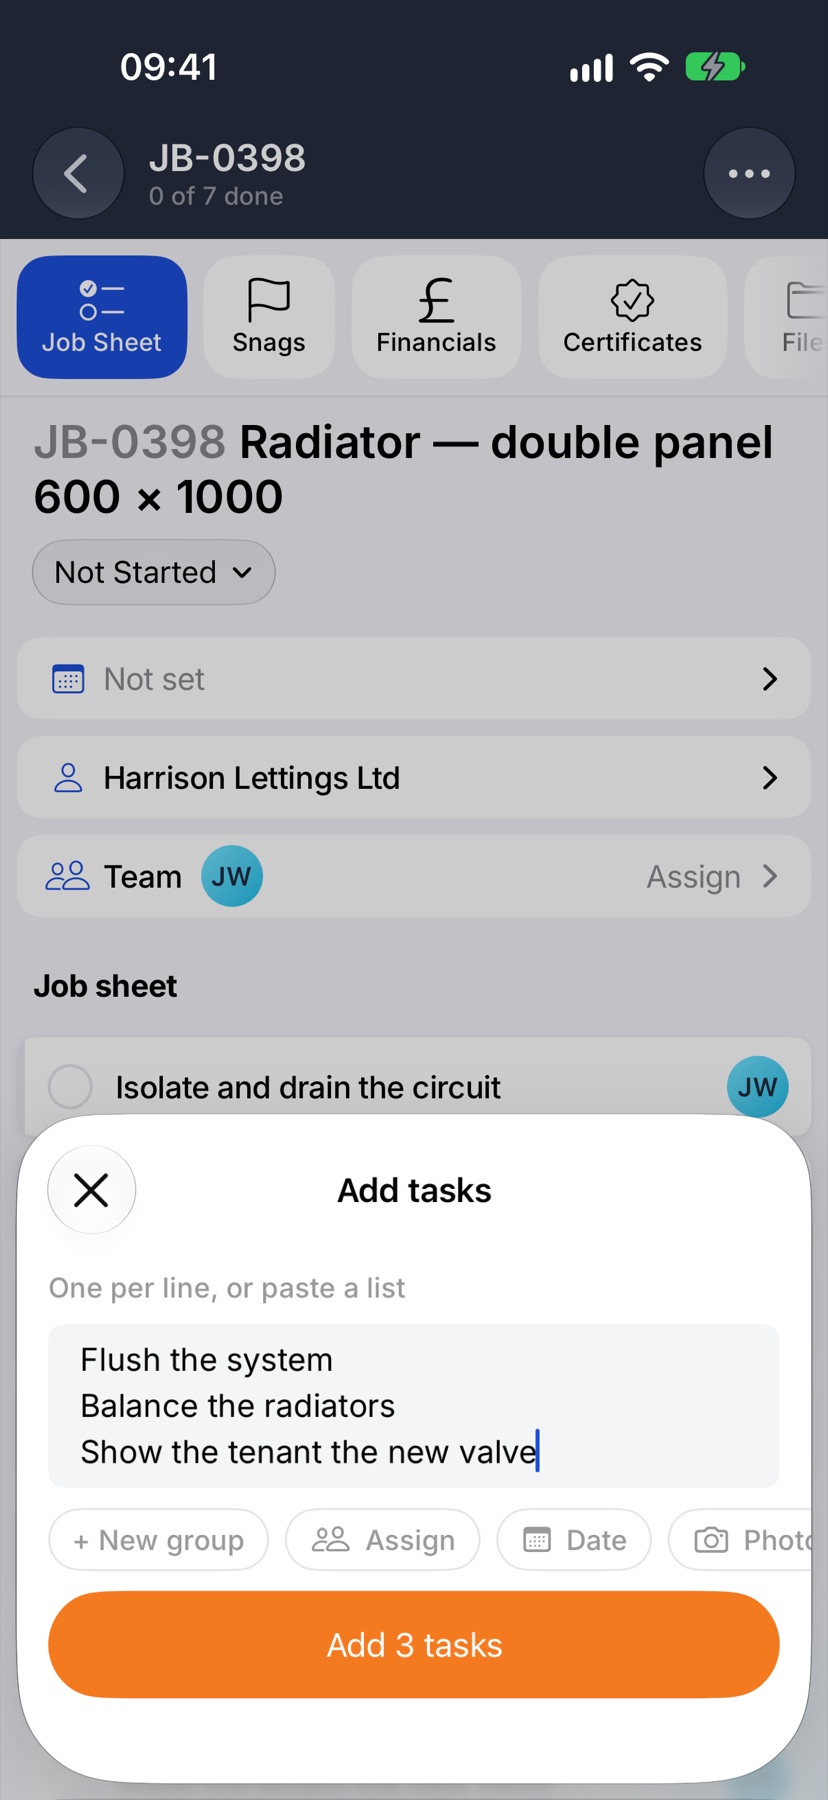
The button counts what you have typed. Tap Add 3 tasks and the sheet closes.
Find them on the job sheet
The new tasks are at the end of the job sheet, each with the job's team on it. The count at the top has gone up.
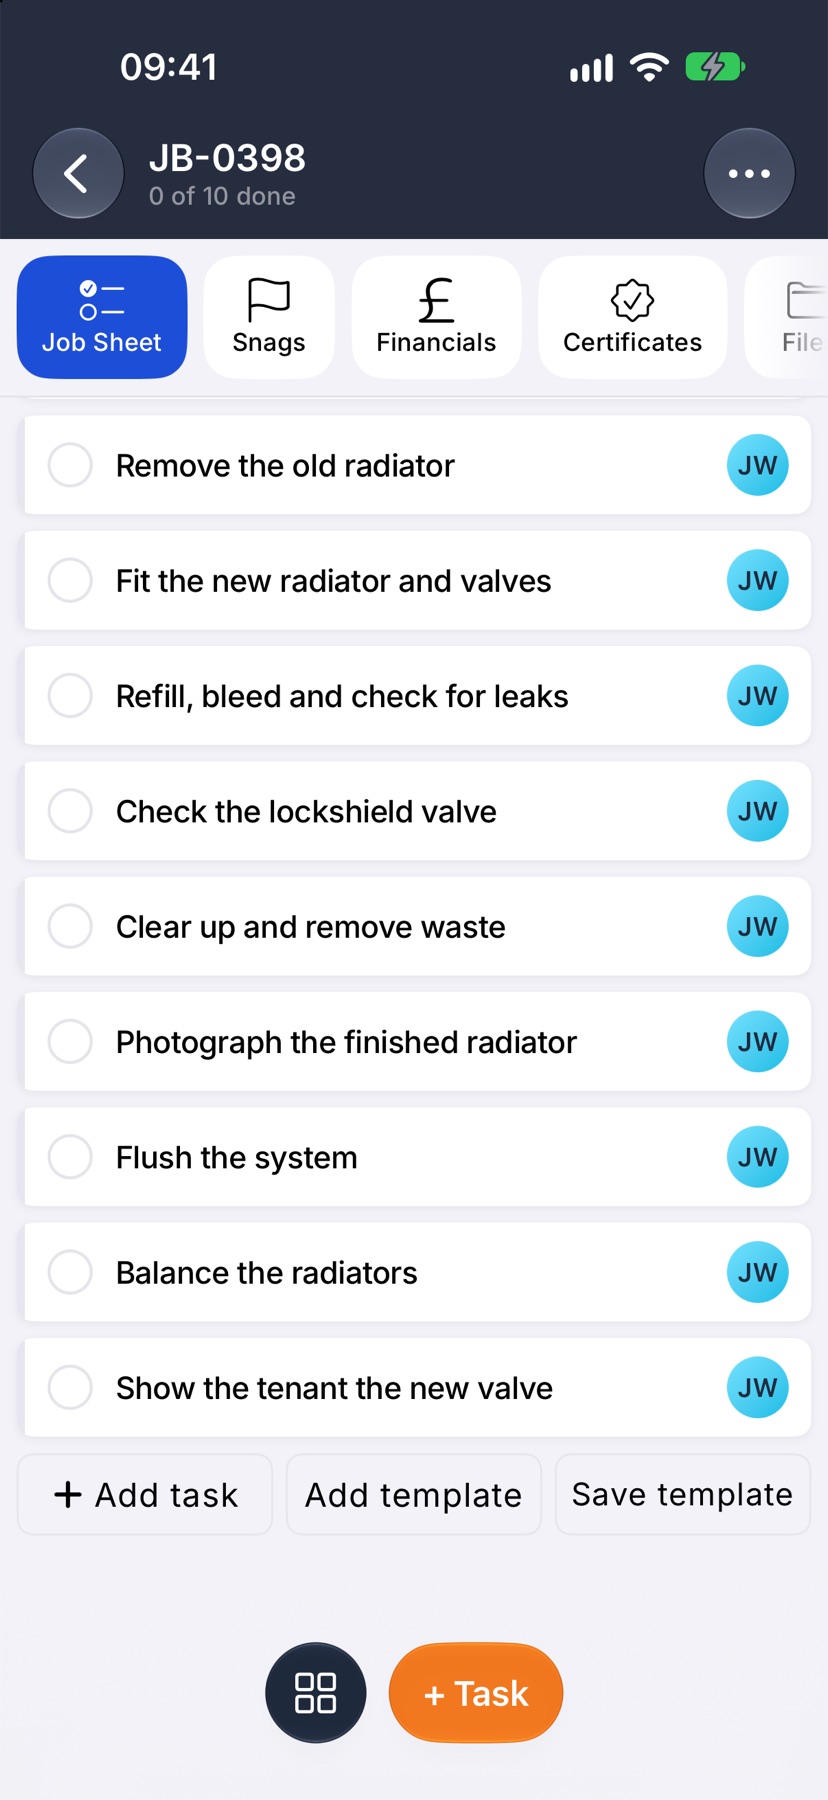
Under the last task, Add task adds one more, Add template adds a whole template's tasks, and Save template keeps this sheet to reuse on other jobs.
Open a task to fill in the detail
Tap a task to open it. Set who it is Assigned to and its date, write instructions, break it into Sub-tasks, and add Photos.
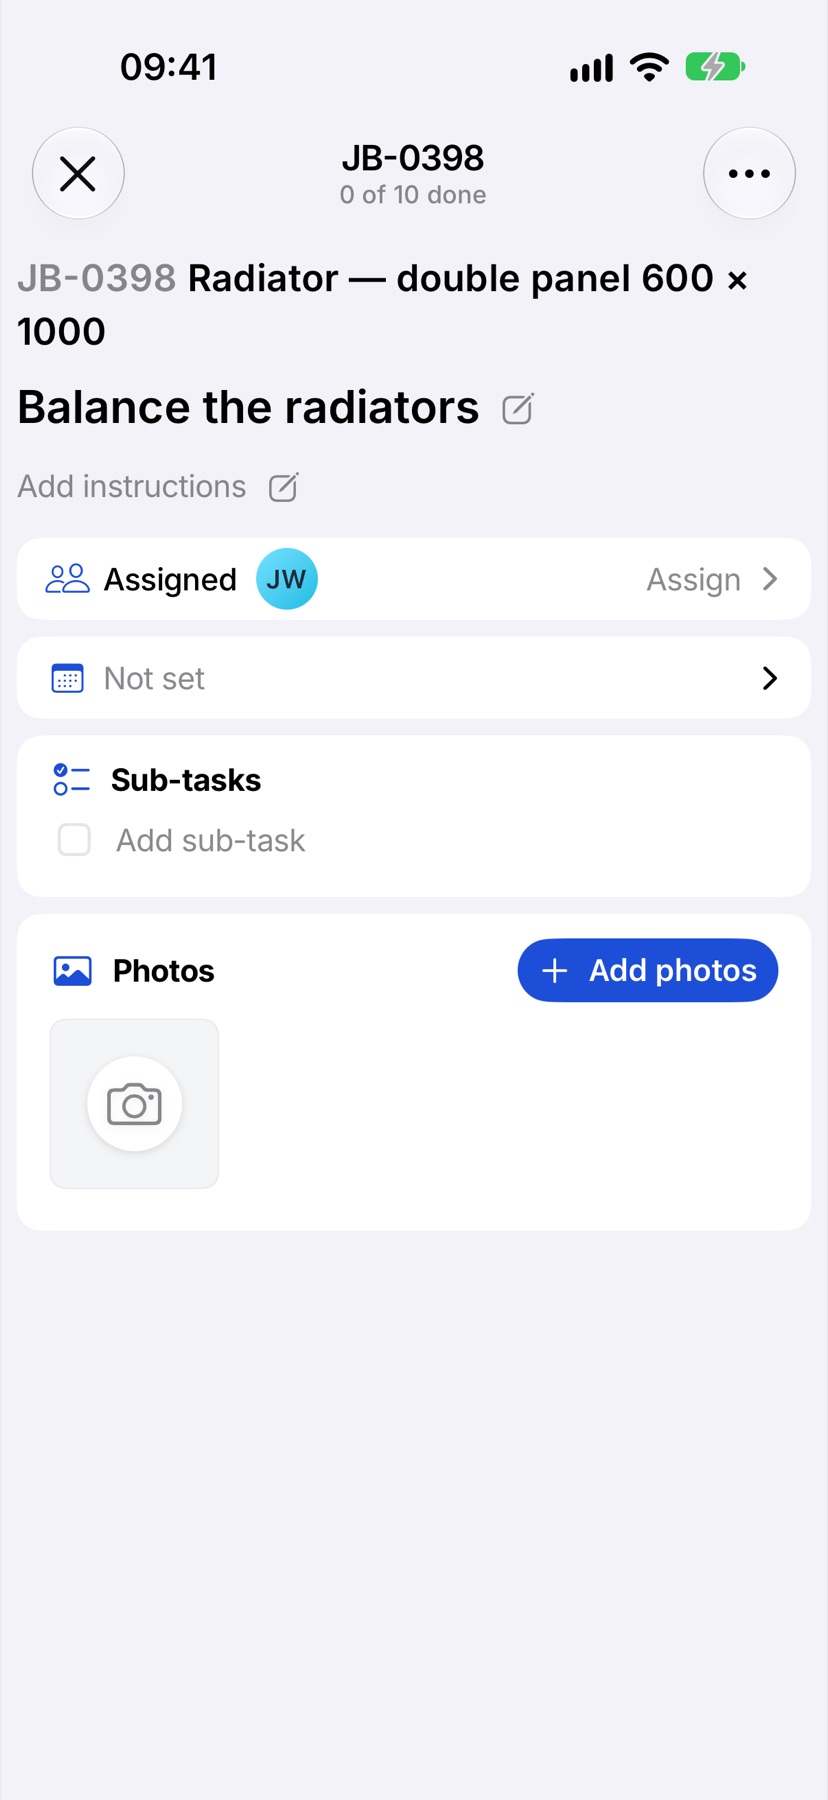
Tap the cross at the top left to go back to the job sheet. Tick the circle beside a task when it is done.
More in Jobs →
- Create a jobStart a job: the customer, the dates, the job sheet and any compliance it needs.
- The job pageHow one job page tracks the work, the photos and the money in one place.
- Complete tasks and add evidenceComplete a task with the photos, notes or signature it asks for — and what to do when it won't tick.
- Take and mark up photosUse the Jobivo camera, draw on a photo before it saves, and see where every shot was taken.
See what else Job sheets can do. Still stuck? Email support@jobivo.co.uk and we'll get back to you.